Custom Activities Node
This node, under Server Configuration in the Workflow Administration Console, allows you to add and delete custom activity references. The node also displays the reference's assembly name, location, and modification date.
Note: To learn more about building custom activities, see the Building Custom Activities in Workflow (C#) or Building Custom Activities in Workflow (VB.NET) white paper on the Laserfiche Support Site (login required).

To open this node
- In the Workflow Administration Console's Console Pane, expand the Server Configuration node.
- Select Custom Activities. The node will list all the custom activity references on the Workflow Server.
Tip: You can refresh this list to reflect recent changes by clicking the Refresh link below Custom Activities in the Actions Pane. Alternatively, right-click the Custom Activities node and select Refresh.
To add a custom activity reference
Tip: You must have file browsing enabled to add a custom activity reference.
- Select the Custom Activities node or any custom activity reference in the center Details Pane.
- Click Add Custom Activity Reference in the Actions Pane.
- In the Select Assembly dialog box, browse to the desired assembly.
- Click Open.
To delete a custom activity reference
- Select a custom activity assembly reference in the Details Pane.
- Click Delete under the reference's name in the Actions Pane, or right-click the reference in the Details Pane and select Delete.
To export the contents of this node in a .csv, .xml, or .txt file
- Select the node in the Console Pane.
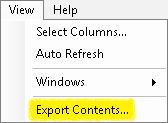
- Select View from the main menu.
- Click
 Export Contents.
 - In the Export data dialog box, name the exported file.
- Select CSV File, XML File, or Tab Delimited Text File from the drop-down menu.
- Click Save.